Getting started with BitDefender
This article provides information on connecting to the GravityZone platform, the initial onboarding steps, and step-by-step instructions for deploying specific security features to optimise your security approach.
GravityZone features are configured and managed using Control Center, a web-based centralised management application accessed using the administrator's username, password, and MFA authentication.
Your first login
- Access the GravityZone login page.
- Sign in using the credentials (username and password) provided to you.
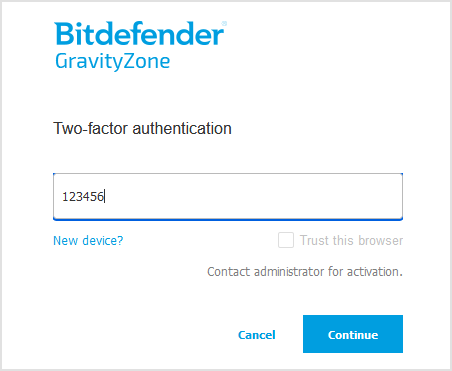
- If this is the first time you are signing in, you will be asked to set up two-factor authentication. You can skip it up to five times, after which you must set it up before signing in.
- You will also have to agree to Bitdedefender's Terms of Service.
- Once you have set up two-factor authentication, you can choose the 'Trust this Browser' option to suspend entering your six-digit authentication code for 90 days.
Adding your licence keys ( only required if you have a yearly licence)
- Once signed in, click your username in the console's upper-right corner and select 'My company.'
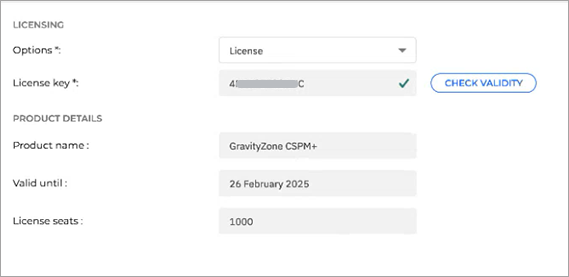
- Go to the 'Licensing' tab, and under the 'Licence usage details' section, click 'Add product'.
- Enter the licence key in the 'Add new product' window.
- Click the 'Check validity' button.

- Click the 'Add product' button.
The initial Setup
Below are the steps required to deploy Bitdefender Security tools (BEST) on your endpoints (Workstations, Servers, etc.) and customise the level of production provided for each type by setting up custom installation packages.
- Sign in to your GravityZone Console
- Go to the 'Installation Packages' page from the left side menu, under 'Network'.
- Click the 'Create' button at the top of the table.
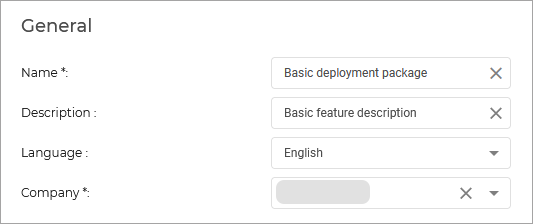
- Fill in the information under the 'General' tab:

- Scroll down to the 'Modules' section, and select the modules you want to deploy on your endpoints
- Optional: you can further customise the installation package. Learn more.
- Scroll down and click the 'Save' button.
- Select the newly created package from the list of packages and click 'Send download links'.

- Enter the email address of the users that will be deploying the security agents on your endpoints, and click 'Send'.
- Open the link in the email to download the installation package on your endpoints.
Tip: do not rename the installation file, as it may cause errors. - Run the file. ]
Run scans on your endpoints from the Control Center
Now the agents are installed, you can run scans on the endpoints.
- Sign in to the Control Center console.
- In the left sidebar of the console, click 'Network'.
- Select the endpoint(s) you want to scan
- Click
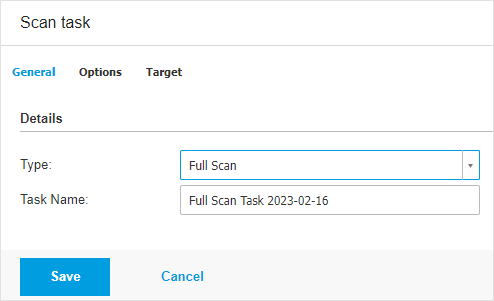
 'Tasks' and the 'Scan'
In the 'Type' category, select 'Full Scan.'
- Save your changes.
On completion, all selected endpoints will perform a full scan in the background and report their status to the control centre.
What's included in the default package, and what's not?
The above procedure makes use of the default policy, and the following features are enabled
- Advanced Anti-Exploit
- Advanced Threat Control
- Bitdefender EDR
- Firewall
- Hyper Detect
- Network Attack Defence
- eXtended Detection and Response
The following features are not enabled by default but can be enabled by creating custom policies and further configuration.
- Content Control
- Device Control
- Endpoint Risk Analysis
- Full Disk Encryption
- Integrity Monitoring
- Security for Storage
- Patch Management
- Security for Exchange
Related Articles
BitDefender GravityZone System Requirements
To protect networks with Bitdefender, customers must install the GravityZone security agents on network endpoints. For this purpose, customers need a Control Center user with administrator privileges over the services needed to be installed and over ...What are GravityZone Bitdefender Security tools
GravityZone provides Windows, Linux, and macOS physical and virtual machine protection with Bitdefender Endpoint Security Tools. On Windows and Linux, the security agent provides a flexible scanning system, making it ideal for mixed environments ...GravityZone Product Features
Features by product Features GravityZone Cloud Security for MSP GravityZone Small Business Security GravityZone Business Security GravityZone Advanced Business Security GravityZone Business Security Premium GravityZone Business Security Enterprise ...
